HowTo: Allow-List CyberHoot’s Domain Name and IP Addresses – G-Suite

New CyberHoot businesses need to allow our training and phishing emails to reach their user’s inboxes directly. This article describes the two steps needed to make this happen.

Note: If you wish to create an allow-list just for yourself personally (not for your company’s whole domain) then visit this HowTo: Allow-List CyberHoot in your Own Personal Gmail Account.

Step #1: allow-list CyberHoot.com domain in GSuite Admin Console

The video below shows you how to do this in less than 1 minute. Please add the domain CyberHoot.com as shown in this video to a newly created or existing Allow-List in GSuite’s Admin Console.

Step #2:  Allow-List by IP Address or Network

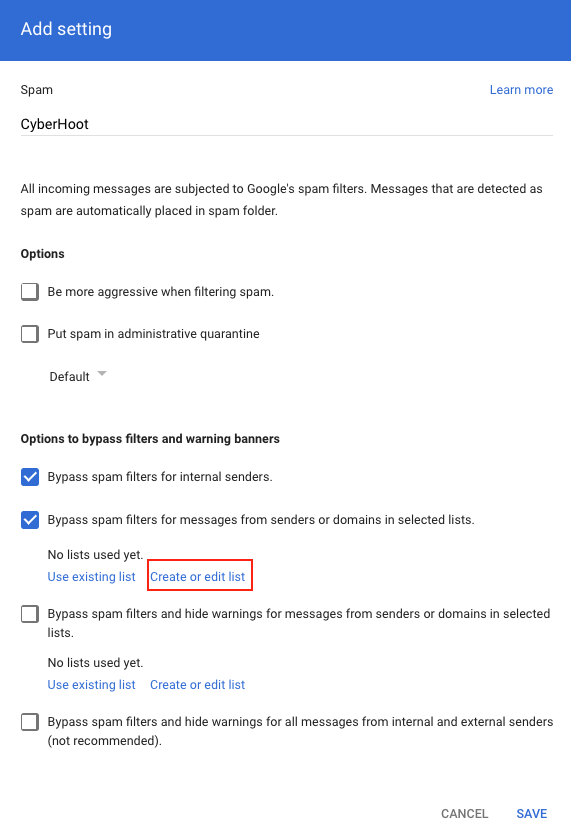
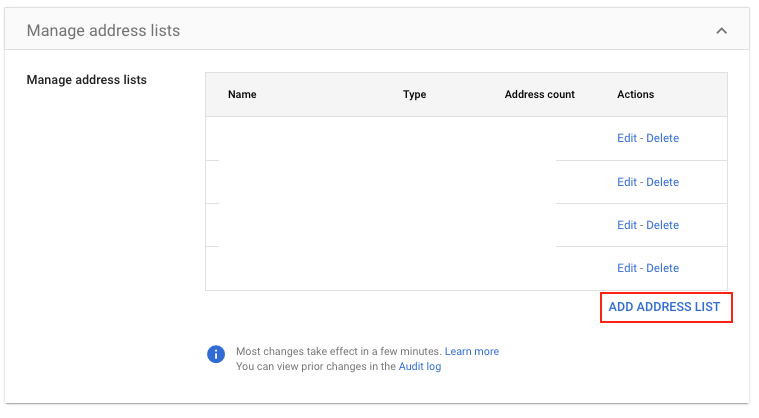
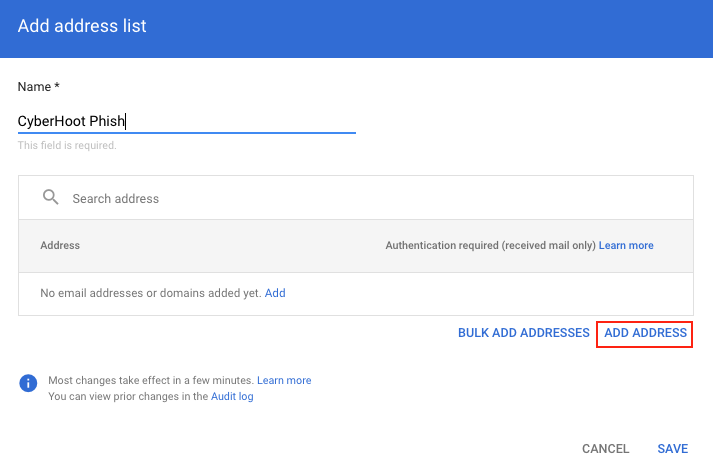
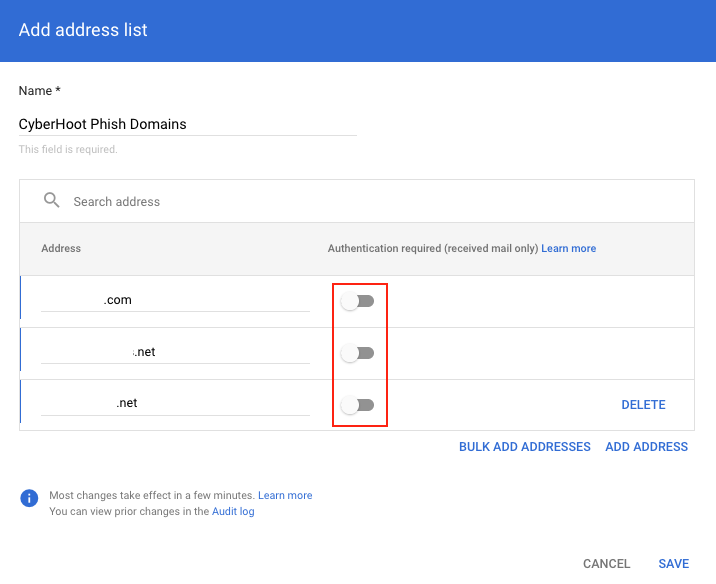
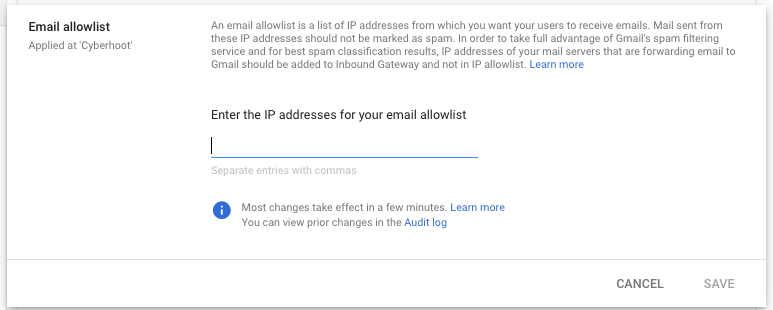
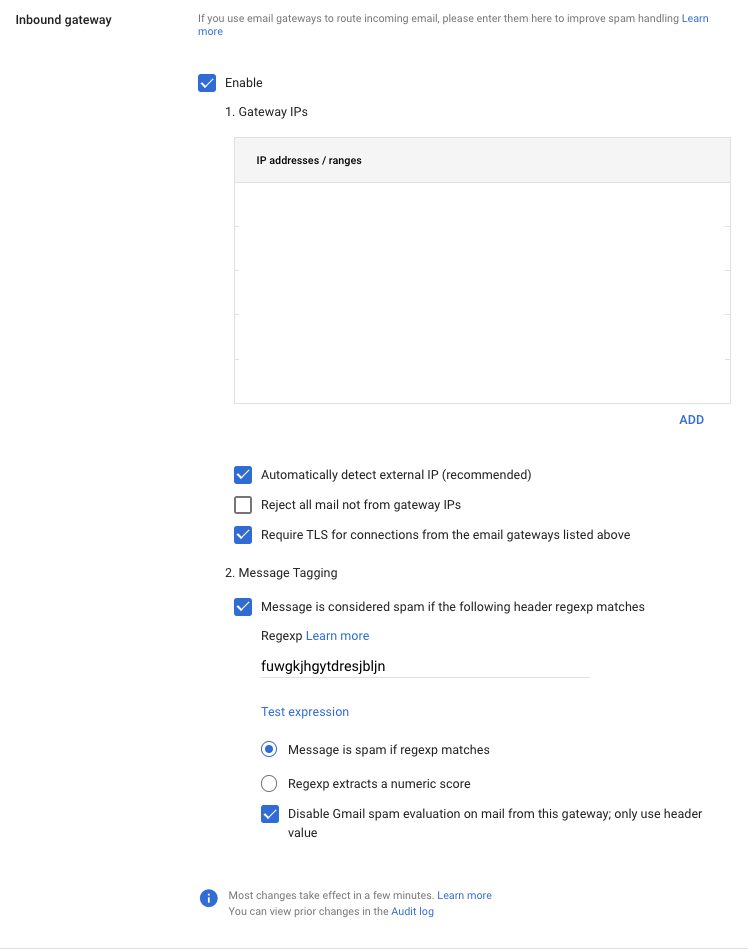
Sometimes, there are additional filters that require you allow-list by IP addresses. For CyberHoot:

  1. Log in to https://admin.google.com and select Apps.
  2. Select G Suite.
  3. Select Gmail.
  4. Select Advanced settings.
  5. In the Organizations section, highlight your Domain. Do not select an organizational unit (OU).
     
    Note: G Suite does not allow Allow-Listing by IP Address for individual IPs, only the entire domain.

  6. In the Email whitelist section, enter our IP addresses.  The required IP addresses and Domain names information are found in this HowTo article:

    CyberHoot Email-Relay IP Addresses, Domains, and Allow-Listing Articles

7. Click Save


Important Note:  If you’re using a 3rd party SPAM provider you will need to Allow-list the domain and/or IP Address in that solution which filters all email before forwarding it to Google Mail accounts.


Part 2: Add CyberHoot’s IP addresses as Inbound Gateways

This method of allow-listing is to prevent the following Google banners from appearing in your user’s inbox when they receive a simulated phishing test from CyberHoot:

This message seems dangerous

Be careful with this message

We have found that this process exempts CyberHoot simulated phishing emails from the Gmail banner warnings. However, this is not documented by Google as an allow-list recommendation.

  1. Log in to your Google Admin Console.
  2. Navigate to Apps > G Suite > Gmail > Advanced settings.
  3. Under General Settings, select your top-level organization (typically your primary domain) on the left.
  4. Scroll down to the Inbound Gateway setting located under the Spam section. Hover over the setting and click the Edit button. This will open the Inbound gateway screen.
  5. Configure the Inbound gateway using the settings below:
    1. Gateway IPs
      Add CyberHoot’s IP addresses. For the most up-to-date list of our IP addresses, please refer to the top of this article.
    2. IMPORTANT: Leave the Reject all mail not from gateway IPs option unchecked. If this is checked, all email will stop flowing to your client.
    3. Check Require TLS for connections from the email gateways listed above.
    4. Message Tagging
      Enter text for the Spam Header Tag that is unlikely to be found in a PST email. This field is required.
      • Example: kzndsfgklinjvsdnfioasmnfroipdsmfs
    5. Select the Disable Gmail spam evaluation on mail from this gateway; only use header value option.
    6. Click the SAVE button.


Additional Reading:  Whitelists and Blacklists – What are they and how do they affect deliverability?

Create a Domain Based White-List in Google's Admin Console for all users in your Domain (1 min)

Share this on your social networks. Help Friends, Family, and Colleagues become more aware and secure.