If your mail filter and spam settings are already configured, this guide covers the one remaining step: configuring Chrome and Edge to allow AttackPhish simulation links to load the training landing page without being blocked.
Why browsers block simulation links
Chrome’s Safe Browsing and Edge’s SmartScreen are security features that flag known phishing domains — including phishing simulation domains — and block users from visiting them. Even after the simulation email reaches the inbox successfully, the browser will show a warning page and prevent the user from reaching the CyberHoot training landing page. A managed browser policy, deployed by IT, tells the browser to allow these specific domains through. Without this policy in place, the simulation cannot complete as intended.
Can a user bypass the warning themselves?
Yes — a user can click ‘Details’ then ‘Visit this unsafe site’ to proceed through a Chrome Safe Browsing warning manually. However, this is not a reliable or scalable solution for an organization, and it creates an inconsistent training experience. The managed policy approach below is the correct fix.
The following four domains are used by CyberHoot to deliver AttackPhish simulations. You will need to add all four to every browser policy configured in this guide.
docunotice.com
messagecenters.net
securedinbox.net
notificationhub.net
Note: These are domain names only — no IP addresses are needed for browser allowlisting. Browser Safe Browsing and SmartScreen policies work on domain names, not IPs.
⚠️ Security reminder: These policies instruct the browser to bypass phishing and malware warnings specifically for the listed domains. Only add CyberHoot-approved simulation domains to this list. Do not add any other domains, as doing so will disable browser protection for those sites for all users covered by the policy.
Always verify this list is current before configuring: cyberhoot.com/howto/cyberhoots-email-ip-addresses-and-hostnames/
Choose the section below that matches how your organization manages Chrome. Most domain-joined Windows environments use Group Policy (GPO). Mac environments use MDM. Google-managed Chromebooks use the Google Admin Console.
Requirements: Endpoints must be joined to a Microsoft Active Directory (AD) domain and running Windows 10 or Windows 11 Pro or Enterprise. You must have Domain Administrator rights to complete these steps.
⚠️ Microsoft Defender for Endpoint users
If your organization has Microsoft Defender for Endpoint (MDE) deployed with Network Protection enabled, MDE can block simulation link clicks independently of Chrome’s Safe Browsing policy. The SafeBrowsingAllowlistDomains GPO alone may not be sufficient. You will also need to add the four CyberHoot domains as ‘Allow’ indicators in the Microsoft 365 Defender portal under Settings > Endpoints > Indicators > URLs/Domains. Both steps may be required.
Google provides a set of policy template files (called ADMX files) that must be installed on your domain controller before Chrome policies can be managed via Group Policy. If your organization already manages other Chrome policies via GPO, these files may already be installed — skip to Part 2 to check.
1. Go to https://chromeenterprise.google/download/ in a browser.
2. Under Chrome Browser, click Download ADM/ADMX templates and choose the “Policy templates”. Do NOT use the option on the right (Google Updater ADM template update) — that is for managing Chrome auto-updates and is not needed here. This will download a ZIP file.
3. Extract (unzip) the downloaded ZIP file. Inside you will find a folder called windows, and inside that a folder called admx.
4. Inside the admx folder you will find these files:
5. chrome.admx and google.admx (the main policy template files)
6. Inside the admx\en-US folder (or your language folder): chrome.adml and google.adml (the language files)
7. Copy chrome.admx and google.admx to the PolicyDefinitions folder on your domain controller. The path is:
\\YourDomain\SYSVOL\YourDomain\Policies\PolicyDefinitions
Replace YourDomain with your actual domain name (e.g., \\contoso.com\SYSVOL\contoso.com\Policies\PolicyDefinitions).
8. Copy chrome.adml and google.adml into the matching language subfolder:
\\YourDomain\SYSVOL\YourDomain\Policies\PolicyDefinitions\en-US
9. Open the Group Policy Management console (Start > Run > gpmc.msc) and verify the files loaded without errors. If you see an error, double-check that all four files are in the correct folders as shown above.
10. Open the Group Policy Management console: press the Windows key, type gpmc.msc, and press Enter.
11. In the left panel, expand your Forest, then Domains, then your domain name.
12. Right-click on Group Policy Objects and select New. Give it a descriptive name such as CyberHoot AttackPhish — Chrome Safe Browsing. Click OK.
13. Right-click the new GPO and select Edit. The Group Policy Management Editor will open.
14. In the Group Policy Management Editor, navigate to the following path in the left panel:
Computer Configuration > Administrative Templates > Google > Google Chrome > Safe Browsing Settings
15. In the right panel, find and double-click: Configure the list of domains on which Safe Browsing will not trigger warnings.
16. In the window that opens, click the Enabled radio button at the top left.
17. Click the Show button that appears. A small table will open where you can enter domain names.
18. Enter each of the four CyberHoot domains, one per row, in the Value column:
docunotice.com
messagecenters.net
securedinbox.net
notificationhub.net
19. Click OK to close the Show table, then click OK again to close the policy settings window.
20. Close the Group Policy Management Editor.
21. Back in the Group Policy Management console, locate the Organizational Unit (OU) that contains the user or computer accounts you want this policy to apply to.
22. Right-click on that OU and select Link an Existing GPO.
23. Select the GPO you just created (CyberHoot AttackPhish — Chrome Safe Browsing) and click OK.
24. Group Policy updates automatically every 90 minutes. To apply it immediately on a test machine, open Command Prompt as Administrator and run:
gpupdate /force
25. Restart Chrome on the test machine.
26. Open a new Chrome tab and go to: chrome://policy
27. Search for SafeBrowsingAllowlistDomains in the policy list. You should see all four domains listed. If the policy is not showing, confirm the GPO is linked to the correct OU and that the ADMX files are in the correct folders on the domain controller.
Requirements: Mac endpoints must be enrolled in an MDM solution such as Jamf Pro or Kandji. You must have administrator access to your MDM console.
1. Log in to your MDM management console (e.g., Jamf Pro or Kandji).
2. Navigate to the section for creating or editing a Configuration Profile for macOS.
3. Add a new payload or profile entry for Google Chrome. This is typically found under a Custom Settings or Application & Custom Settings section.
4. Set the Preference Domain (also called the bundle ID) to:
com.google.Chrome
5. Add the following key and values to the configuration:
Key: SafeBrowsingAllowlistDomains Type: Array Values: docunotice.com messagecenters.net securedinbox.net notificationhub.net
6. Save the profile and assign it to the relevant devices or device group.
7. After the profile applies, open Chrome on a managed Mac and go to chrome://policy to verify SafeBrowsingAllowlistDomains is listed with all four domains.
Need more detail?
The exact steps for creating a configuration profile vary by MDM platform. Refer to your MDM vendor’s documentation for creating a Chrome custom settings profile, or contact your MDM administrator for assistance.
Requirements: Devices must be enrolled in Chrome Browser Cloud Management or managed via the Google Admin Console.
1. Log in to the Google Admin Console at https://admin.google.com using an administrator account.
2. In the left navigation menu, go to Devices > Chrome > Settings.
3. Click on Users & browsers.
4. At the top, select the Organizational Unit (OU) you want the policy to apply to. To apply it to all users, select the top-level organization.
5. Scroll down or use the search bar to find the setting called Safe browsing allowed domains.
6. Click on the setting and enter each of the four CyberHoot domains, one per line:
docunotice.com
messagecenters.net
securedinbox.net
notificationhub.net
7. Click Save.
8. The policy will apply on the next Chrome browser sync. To verify, open Chrome on a managed device and go to chrome://policy. Look for SafeBrowsingAllowlistDomains in the list.
Edge’s SmartScreen feature can also block simulation link clicks. If your organization uses Edge, configure the following policy in addition to the Chrome steps above.
Requirements: Endpoints must be joined to a Microsoft Active Directory (AD) domain and running Windows 10 or Windows 11 Pro or Enterprise. You must have Domain Administrator rights.
⚠️ Important: Edge ADMX templates must be downloaded separately
Unlike Windows OS policies, Microsoft Edge ADMX templates are NOT included with Windows by default and must be downloaded and installed manually before Edge policies will appear in the Group Policy editor. Follow Part 1 below before attempting to configure any Edge policy.
⚠️ Microsoft Defender for Endpoint users
If your organization has enabled Microsoft Defender for Endpoint (MDE), the SmartScreenAllowListDomains GPO policy is ignored entirely by MDE — this is confirmed in Microsoft’s own documentation. You must configure the allowlist through the Microsoft 365 Defender portal under Settings > Endpoints > Indicators > URLs/Domains instead of using GPO. Note: MDE Network Protection can also block simulation links in Chrome and other non-Edge browsers independently. If simulation links are still being blocked after configuring both the Chrome and Edge policies, check whether Network Protection is enforced in your MDE deployment and add the CyberHoot domains as Allow indicators in the Defender portal.
1. Go to https://www.microsoft.com/en-us/edge/business/download in a browser.
2. Select your desired Channel (Stable), the latest Version, and your Platform (Windows 64-bit). Click Get Policy Files. This will download a file called MicrosoftEdgePolicyTemplates.zip (or .cab).
3. Extract the downloaded file. Navigate to the folder: windows > admx.
4. Inside the admx folder, find these files:
5. msedge.admx (the main Edge policy template file)
6. Inside the admx\en-US folder (or your language folder): msedge.adml (the language file)
7. Copy msedge.admx to the PolicyDefinitions folder on your domain controller:
\\YourDomain\SYSVOL\YourDomain\Policies\PolicyDefinitions
8. Copy msedge.adml to the matching language subfolder:
\\YourDomain\SYSVOL\YourDomain\Policies\PolicyDefinitions\en-US
9. Open the Group Policy Management console (Start > Run > gpmc.msc) and confirm that Microsoft Edge now appears under Administrative Templates. If it does not appear, verify the files are in the correct folders.
10. Open the Group Policy Management console: press the Windows key, type gpmc.msc, and press Enter.
11. Navigate to your existing CyberHoot GPO (created in the Chrome section above) or create a new one by right-clicking Group Policy Objects and selecting New.
12. Right-click the GPO and select Edit.
13. In the Group Policy Management Editor, navigate to:
Computer Configuration > Administrative Templates > Microsoft Edge > SmartScreen settings
14. Find and double-click: Configure the list of domains for which Microsoft Defender SmartScreen won’t trigger warnings.
15. Click the Enabled radio button.
16. Click Show and enter each of the four CyberHoot domains, one per row:
docunotice.com
messagecenters.net
securedinbox.net
notificationhub.net
17. Click OK, then OK again to close the policy window.
18. Close the Group Policy Management Editor and ensure the GPO is linked to the correct OU (see Chrome Part 4 above for linking steps).
19. To apply immediately on a test machine, open Command Prompt as Administrator and run:
gpupdate /force
20. Restart Edge and go to edge://policy to verify SmartScreenAllowListDomains is listed with all four domains.
1. Requirements: Devices must be enrolled in Microsoft Intune. You must have Intune Administrator rights.
2. Log in to the Microsoft Intune admin center at https://intune.microsoft.com using an administrator account.
3. Go to Devices > Configuration profiles and click Create profile.
4. Set Platform to Windows 10 and later and Profile type to Settings catalog. Click Create.
5. Give the profile a name such as CyberHoot AttackPhish — Edge SmartScreen. Click Next.
6. Click Add settings and search for SmartScreen in the settings picker.
7. Find and enable Configure the list of domains for which Microsoft Defender SmartScreen won’t trigger warnings under the Microsoft Edge category.
8. Enter each of the four CyberHoot domains as separate entries.
9. Click Next, assign the profile to the relevant device group, and click Create.
10. After the policy syncs to devices, verify by opening Edge and going to edge://policy.
After deploying the policies, always test before launching the full campaign.
1. Send a test simulation to yourself or a small group (5–10 people) from the CyberHoot admin console.
2. On a managed device, click the link in the simulation email.
3. Confirm the CyberHoot training landing page loads with no browser warning in Chrome.
4. If Edge is used in your organization, repeat the test in Edge.
Policy not showing at chrome://policy or edge://policy?
This means the policy has not yet applied to that device. Try running ‘gpupdate /force’ from Command Prompt as Administrator, then restart the browser. If it still does not appear, confirm the GPO is linked to the correct OU and that the ADMX files are installed in the correct SYSVOL folder on the domain controller.
Warning still appearing after policy is confirmed?
Check that the domain showing in the browser warning exactly matches one of the four domains in your allowlist. If the simulation email uses a subdomain (e.g., sim.docunotice.com), the root domain entry (docunotice.com) should still cover it. Contact CyberHoot support if the issue persists.
CyberHoot Support: support@cyberhoot.com
Full allowlisting guide and IP/domain reference: cyberhoot.com/howto/cyberhoots-email-ip-addresses-and-hostnames/
Discover and share the latest cybersecurity trends, tips and best practices – alongside new threats to watch out for.
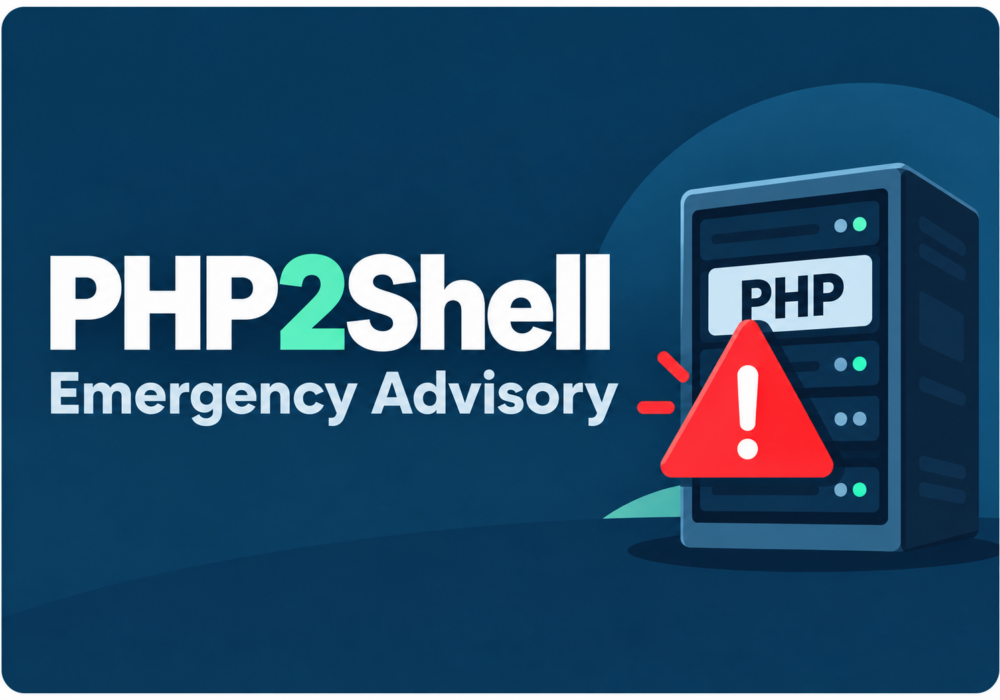
Severity: CRITICAL (CVSS 9.2) | Issued: October 22, 2026 On October 21, two critical flaws in PHP,...
Read more
Author: Katie Boquetti | Editorial: Craig Taylor Editorial by Craig Taylor: Even before Claude Code made...
Read more
Author: Katie Boquetti | Editorial: Craig Taylor Editorial by Craig Taylor: We've known for a while here...
Read moreGet sharper eyes on human risks, with the positive approach that beats traditional phish testing.