If your company uses Microsoft Azure / Entra ID, you can use it as a simple and effective way to manage users within CyberHoot. Follow the steps below:
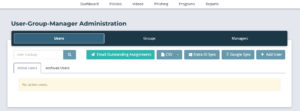
1- Upon login, you will find yourself on the Dashboard screen. Click on “Users” or alternatively, “Admin” then “User-Group-Manager” on the top right of the screen.
2- Click on the “Entra ID Sync” button.
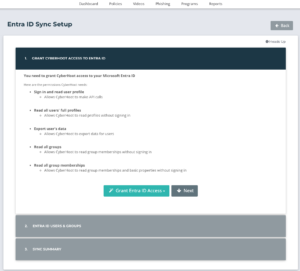
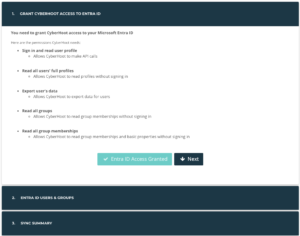
3- Click on “Grant Entra ID Access”.
4- Click on either “Public Cloud Access” if entering a regular business account or “Government Cloud Access” if your environment is hosted on the Gov cloud.

5- Enter the Entra ID credentials.

6- Click on Next.
7- This will put you on Entra ID Users & Groups, from there you can exclude unlicensed and/or external users from synchronization. (Note: Some companies choose to train unlicensed users as well as external consultants or subcontractors.)
At this point you will also select if you are going to sync the Entra ID managers or Assign all sync’d users to a local manager.
Hit “Save Sync Settings” to continue.
8- You must choose between two options: (1) Sync by Groups, or (2) Sync by Users.
9- Under the “Action” Column, users show as “Skipped” or “Syncd“. Click either word to switch users between “Skipped” or “Syncd”.
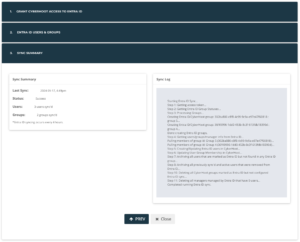
9- Click “Sync Now” to synchronize users manually. Users auto-sync every 4 hours.

10- Click on Close and click on Back
This article explains how to add Employee Managers to their Azure AD profile.
Defining managers for each employee in CyberHoot is very important. Employee managers are Carbon Copied (CC’d) on reminder emails sent to employees. This only happens when an Employee has not completed an assignment by the due date.
Please note: Azure AD Government Community Cloud (GCC) environments must register an Enterprise Application to synchronize users. Those instructions are found here.
Step 1- Permission and Consent: Administrator logs into Microsoft and CyberHoot is assigned read-only permissions using the principle of least privilege, assigning the permissions listed below.
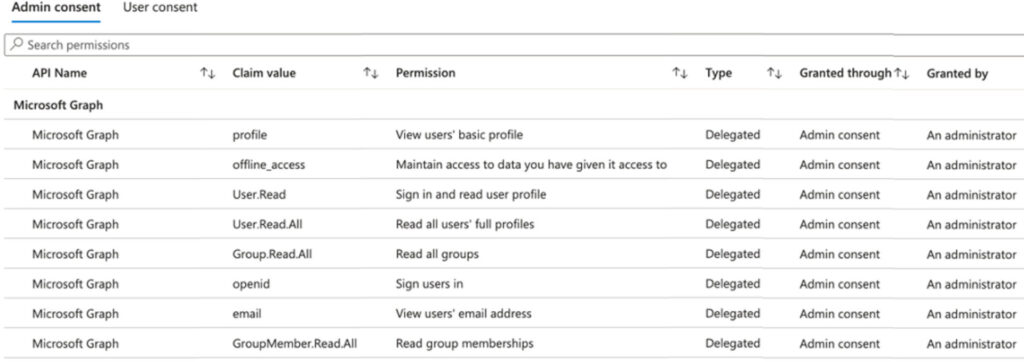
Step 2 – Token Acquisition: CyberHoot requests an OAuth 2.0 token from Azure AD / Entra ID. Note that CyberHoot will not know nor store the password used by the admin.
Step 3 – Token Grant: Azure AD / Entra ID validates the request and, if successful, issues an access token. This token encapsulates the permissions granted to CyberHoot.
Step 4 – Accessing Resources with the Token: CyberHoot uses this token to access the information on the table above. This information is used to add users to CyberHoot.
Discover and share the latest cybersecurity trends, tips and best practices – alongside new threats to watch out for.

Ever had your phone suddenly lose service for no reason, followed by a flood of “reset your password”...
Read more
As smart homes get smarter, so do their habits of watching, sensing, and reporting. Enter WiFi Motion Detection, a...
Read more
Spoiler alert: If you’re still using “password123” or “iloveyou” for your login… it’s time for an...
Read moreGet sharper eyes on human risks, with the positive approach that beats traditional phish testing.